Home        Main menu

This page last updated: June 17, 2019


Tire Pressure Monitor Systems

Description & operation Upgrading to the TPMS TPM System part #'s
Retraining the sensors Monitor system test Troubleshooting New AutoPump system  

See also:  EVIC  and  HomeLink


Tire pressure display
   
Tire pressure display


Valve stem/transmitter


DESCRIPTION AND OPERATION

The Tire Pressure Monitor System is a safety and convenience feature that was introduced at the start of the 2002 model year. It was offered as an option on all WJ models except the Laredo Sport. Each of the vehicle's wheels have a valve stem with a pressure sensor and radio transmitter built in. Signals from the tire pressure sensors are received and interpreted by the EVIC. A sensor in a mounted wheel will broadcast its detected pressure once per minute when the vehicle is moving faster than 25 mph. The spare tire sensor (if equipped) will broadcast once every hour. Each sensor's broadcast is uniquely coded so that the EVIC can determine location.

The system is capable of displaying actual tire pressure levels for all four tires and the spare, is accurate to within +/- 1 PSI under all conditions, unaffected by uneven loading or trailering, unaffected by slippery road conditions, and is able to monitor tire pressure while the vehicle is at rest. Each tire transmitter is battery powered. The battery life is projected to last 7-10 years under normal operating conditions.

The system identifies the location of the four mounted tires by way of a simple initial training process. The EVIC is put into a programming mode while a magnet is momentarily placed, in sequence, on each of the valve stems. A signal is sent back that identifies the LF/RF/LR/RR tire locations as well as the spare (if equipped). This is an easy process that can be done by anyone, and is explained in detail below.

If the spare is moved and mounted on the vehicle, the display will chime and display for five seconds the message "Spare swap detected". So how does the system know the spare has been switched? The spare tire transmitter is programmed to send a signal hourly. Any and all mounted wheels, when spinning above 25 MPH, will transmit their signal every minute. The system will detect that the tire previously programmed as the spare was mounted on the vehicle when the signal from that tire changes from hourly to every minute.

The valve stem transmitters can be easily installed into any wheels that fit the WJ's, whether factory or aftermarket. The spare can also be mounted atop the vehicle and still be reconized as such by the system. As well, a set of additional transmitters can be purchased to install into a set of different tires for those owners who often change their wheels and tires for off-roading. Note that special Training is required if you are using steel wheels. See the "Training" section below for more information.

Starting in January 2002, a 4-Tire system was introduced, eliminating the spare tire sensor. This system was offered on all WJ's that came with a steel spare wheel. Models with the factory chrome wheels/chrome spare get the 5-tire system. Upon special request, the 4-tire system modules can be programmed by the dealer to turn on the 5th spare tire bit. A 5th valve stem module would have to be purchased and installed into the spare.


In addition to the frequencies shown in the picture, if a tire loses more than 1.5 psi of pressure the signal will be sent every five seconds.


TIRE PRESSURE MONITOR SYSTEM THRESHOLDS / WARNING CHIMES

The Electronic Vehicle Information Center (EVIC) in the overhead console monitors the wireless tire pressure signals from the tire sensors and determines if any tire has gone below the low pressure threshold or raised above the high pressure threshold, as shown in the table below. A warning is only sounded when a particular tire, any tire, goes above or below the thresholds. These thresholds are preset by the factory and are not changeable.


Low tire pressure thresholds High tire pressure thresholds
System status indicator Tire Pressure System status indicator Tire Pressure
On 25 PSI On 45 PSI
Off 28 PSI Off 40 PSI
On the "Low" side, the warning will chime when a tire drops down to 25 PSI, and the display will read "Low Pressure". On the "High" side, the warning will chime when a tire pressure exceeds 45 PSI, and the display will read "High Pressure".

  • The warning message displays for three seconds and then switches to the tire pressure "trip" screen.
  • The particular tire that is low and caused the message will blink at one second intervals on the display.
  • The blinking will continue for the rest of the ignition cycle OR until an EVIC button is pressed.
  • If the display is changed without correcting the condition, the warning will reappear (without the chime) in 60 seconds.
  • If a tire becomes low while the vehicle has been off, the warning signal will appear on the display about 8-10 seconds after the ignition is turned on.


ADDING THE TPMS TO WJ GRAND CHEROKEES

Note: It appears that some of the wheels used on 1999-2001 Grand Cherokees may not be compatible with the tire pressure valve/transmitter stems, due to a larger ridge which does not allow the stem to seat properly. This has so far been confirmed for the Timberline wheel used on 1999-2001 Laredo models. A 2001 Laredo owner used an angle grinder on his Timbeline wheels to remove a 1/8" X 1-1/2" area of metal, which was at the outer edge of the ridge away from the bead/seat area. This allowed for the sensor to mount flush against the wheel and align perfectly with the valve stem hole.

So far we have confirmed that the 1999-up Silverblade #1, Silverblade #2, the 2001-up Rogue Chrome wheels and the 2001 Limited Silverblade 3 wheels are compatible with the sensors, with no alterations required. In addition, any wheel used on 2002-up models would be compatible. See our Factory wheels and tires page for information on the different wheels used on 1999-2004 Grand Cherokee's.

The Tire Pressure Monitor System can be easily added to 2002-2004 model year WJ vehicles, although it can be rather expensive if the required parts are purchased new from a dealer. The EVIC module inside the console must be replaced with the advanced version that includes the TPMS circuitry. There is no extra wiring required, the existing module is simply removed and replaced with the new one. Most EVIC modules are interchangeable. If you have the standard EVIC for example, you can upgrade and install either of the two step-up models. One adds HomeLink, and the other adds HomeLink plus the TPMS. The old module can be sold if desired to slightly offset some of the upgrade costs.


Tire Pressure Monitor System parts
EVIC module
(Note: does not include lens)

(All modules will work on all 1999-2004 Grand Cherokees. Some 1999-2001 wheels may require a modification for the sensor to fit, see comments above)

Qty: 1P/N: 56042756AF
(2002 models)

P/N: 56042756AG*
(2002/2003 models - starting Jan. 2002)

P/N: 56042756AI**
(2003 models)

P/N: 56042756AJ**
(2003/2004 models - starting Feb. 2003)

MSRP: $ 645.00 ea.
EVIC lens
(Note: not needed if existing lens is re-used)
Qty: 1P/N: 5012882AAMSRP: $ 20.75 ea.
Magnet, trainingQty: 1P/N: 52109664AA
(Similar to Miller Special Tool 8821)
MSRP: $ 19.90 ea.
Sensor / Transmitter
(Note: sensors cannot be used on spare tires with steel wheels)
Qty: 5P/N: 52088990AC MSRP: $ 67.50 ea.
Valve stem nutsQty: 5P/N: 52088961AAMSRP: $ 5.80 ea.
Valve stem capsQty: 5P/N: 5083124AAMSRP: $ 3.85 ea.
Valve core, aluminum
(Note: Included with Sensor / Transmitter)
Qty: 5P/N: 4897346AAMSRP: $ 2.30 ea.
Quantities noted in red text are what is required when upgrading from a basic module to the TPMS module.

* Starting with 2003 model year production, the "Instant MPG" feature was deleted on all modules.

** "AG" series (January 2002) and newer modules are programmed with either the 4-tire system or the 5-tire system. The 4-tire system modules can be programmed by the dealer to turn on the 5th spare tire bit. Most Limited and Overland models that had the TPMS option came with the 5-tire version while Laredo models (steel spare tire) came with the 4-tire system.

(Prices listed are for reference purposes only and may vary by dealer. Parts are not available from this web site. Prices are current as of October, 2008)


See EVIC modules for a complete list of Grand Cherokee EVIC module part numbers.


INSTALLING AN UPGRADED EVIC MODULE


Overhead console removal
    
Overhead console removal


1. Disconnect the negative cable on the battery.

2. Remove phillips screw. The screw is located near the windshield side, and should be removed with a non-magnetic screwdriver (to avoid interference with the compass).

3. Grab the console from the sides, wedging your fingers underneath it. Carefully and firmly pry it straight down. Slightly rocking it back and forth while pulling downward makes it easier. The EVIC module assembly can be removed without unhooking the courtesy light or sunroof wiring. It is attached with four phillips screws and has one wiring harness.

4. To completely remove the overhead console, disconnect the EVIC harness, courtesy light harness, and the sunroof switch connector.


EVIC module front
   
EVIC module removal
The EVIC assembly, above left, is attached to the console with four screws.


5. Remove the EVIC module. Remove the 4 phillips screws attaching the module to the overhead console assembly. There is one small wire harness to unplug, located near the back of the module. The module assembly can now be removed from the console.

6. Install the upgraded module. The new module will fit exactly in place of the old one. If the new module does not contain the plastic lens, the lens from your old module will need to be used. The lens easily snaps on and off the EVIC. Attach the wiring harness and screw the new module in place with the 4 phillips screws.

7. Reinstall the overhead console. Firmly press the overhead console back into the headliner bracket and attach the phillips screw.

8. Reconnect the negative battery cable.

Note: The Compass Zone information for the EVIC may have to be re-entered, this can be done via the menu.


Tire pressure sensor module

Tire pressure sensor module.
   
tire pressure sensor location

Inside view of installed sensor.


9. Have the sensor/valve stems installed onto the rims. When installing the tire pressure sensor/transmitter, inspect the sealing O-ring at the bottom of the valve stem for any sign of damage or deterioration. Replace O-ring if necessary, before installing the pressure transmitter on the wheel. Also, be sure the surface of the wheel that the O-ring seals against is clean and not damaged.

9a. Tighten the tire pressure sensor/transmitter mounting nut to a torque of 7 N·m (64 in. lbs.) When tightening the sensor/transmitter nut, hold the transmitter so it does not rotate. If the sensor/ transmitter rotates so the top edge is not level with the wheel, damage to the transmitter will occur when mounting the tire. If the top edge of the transmitter is not level with the wheel, it can be rotated into position by lightly tapping it with your hand.

CAUTION: When mounting the upper bead of the extended mobility tire, the proper procedure must be used. Not using the proper procedure will result in damage to the wheel and tire.

9b.Mount the upper bead of the tire on the wheel.

9c. Install the original or an OEM replacement valve stem cap on the valve stem.

9d. Using a soap solution, check that no air leak is present where the valve stem mounts to the wheel.

9e. Balance the tire/wheel assembly using the correct procedure for using wheel flange mount and stick-on wheel weights.

9f. Install the tire/wheel on the vehicle.

9g. The system must then be retrained with the special magnet so that the EVIC learns the specific location of each transmitter.


tire pressure module  location

Tire pressure sensor installation detail.


Tire pressure sensor/valve removal

NOTE 1: The cap used on this valve stem contains an O-ring seal to prevent contamination and moisture from entering the valve stem. Retain this valve stem cap for re-use. Do not substitute a regular valve stem cap in its place.

NOTE 2: The valve stem used on this vehicle is made of aluminum and the core is nickel plated brass. The original valve stem core must be reinstalled and not substituted for a valve stem core made of a different material. This is required to prevent corrosion in the valve stem caused by the different metals.

CAUTION: The pressure transmitter must be removed from the wheel and dropped into the tire prior to breaking the bead and dismounting the tire. Failure to do this will greatly increase the risk of damaging the pressure transducer when servicing the tire.


Tire sealants

CAUTION: THE USE OF TIRE SEALANTS IS STRICTLY PROHIBITED FOR VEHICLES EQUIPPED WITH THE TIRE PRESSURE MONITORING SYSTEM. TIRE SEALANT CAN CLOG TIRE PRESSURE SENSORS.


10. Training / Retraining the tire sensors:

The sensor transmitters can easily be retrained by anyone and takes just a couple of minutes to complete. The special magnet tool used for retraining is included with those vehicles in which the factory has installed the TPMS option. The magnet can also be purchased for around $25, otherwise a pair of 6" or so speakers with good size magnets will do the trick.

1. On the overhead console, use the "Menu" button to advance to the "Retrain" option in the EVIC menu.

2. When "Yes" is selected, training will begin, starting with the left front tire.

3. Place the special magnet momentarily on each valve stem, one at a time, in clockwise order (LF, RF, RR, LR, Spare). You'll have 60 seconds to place the magnet on the first tire stem and 30 seconds for each of the other four, the spare being last. As each tire location is "learned", there is a confirming horn chirp. It may take 5-10 seconds for the confirming chirp once the magnet is placed on each stem. That's it, the correct tire pressure will now be displayed for the corresponding tires and the TPMS is fully functional.

Note that for aftermarket steel wheels the training magnet cannot be used and that a 125kHz transponder is necessary to retrain the EVIC to the sensors. This process can be done by the dealer with a DRB-III tool. The ID's of each sensor must be written down and assigned a location (LF, RF, RR, LR, SP). They are then rewritten to tell the EVIC which position each sensor is in.


Tire pressure re-lear magnet

Tire pressure sensor re-learn magnet
   
Tire pressure re-lear magnet

Placement location for retraining


TIRE PRESSURE SYSTEM TEST


TPMS test mode


The following test can be used to verify two functions. One, that the tire pressure sensors are transmitting properly and two, the EVIC module is receiving these transmissions accordingly. Using the STEP button on the overhead console, scroll to the blank display, then press the RESET button for five seconds, a beep will sound indicating the start of this test. The vehicle icon and transmission counters will now be displayed, (same display as individual tire pressure except counters replace tire pressure values).

Upon entering the test mode, the EVIC will clear the sensor counter and each time a sensor signal for a road tire is received, the EVIC will update the counter value. The vehicle must be driven to 20-25 mph to initially activate the transmitters, and once activated they will stay activated for 15 minutes after the vehicle stops moving. The counter values should all increment somewhat evenly. If any of the road tires indicate a much different value than another tire sensor, this is a sign of a problem. Replace the appropriate tire sensor and retest the system. This test will continue until any of the overhead console buttons are pressed or the ignition is turned off.


EVIC module test mode

Self test mode:

1. Ignition off
2. Press and hold both the C/T and Reset buttons
3. Turn ignition to "On"
4. Release buttons after you see the software revision appear on the display

5. Following completion of these tests, the EVIC will display one of the following messages:

  • Pass Self Test
    Momentarily depress and the Reset button to return to the compass/computer display mode. The EVIC is working properly.

  • Failed Self Test
    The EVIC module has a failure. The EVIC module is faulty and must replaced.

  • Not Receiving J1850 Message
    The EVIC is not receiving proper message input from the PCI data bus. This can result from one more faulty electronic modules in the vehicle, or a faulty PCI data bus. The use of a DRB scan and the proper Diagnostic Procedures manual required for further diagnosis.


DRBIII test mode:

1. Select "Body", "VIC", "Sys test" and then "Self test".


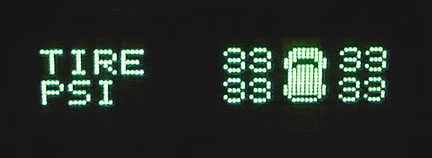
TIRE PRESSURE SYSTEM TROUBLESHOOTING & DISPLAY MESSAGES


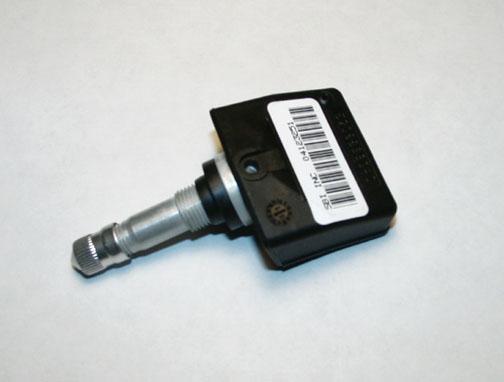
The Sensor/Transmitters are not internally serviceable. If a single Sensor/Transmitter fails and cannot be detected by the EVIC, it must be replaced. Replacement is also required when a "Battery Low" message is displayed. Estimated battery life is 7-10 years.

There are four conditions which will cause a Tire Pressure Monitoring System fault to be set. All fault codes are associated with a specific wheel location.

1. If the EVIC detects a non-transmitting Sensor/ Transmitter in a road wheel for ten consecutive minutes with vehicle speed above 25 MPH:

  A. An active fault code will be stored
  B. A Chime is requested
  C. "TIRE SENSOR BAD / MISSING" or "SERVICE TIRE PRESSURE SYSTEM" will be displayed
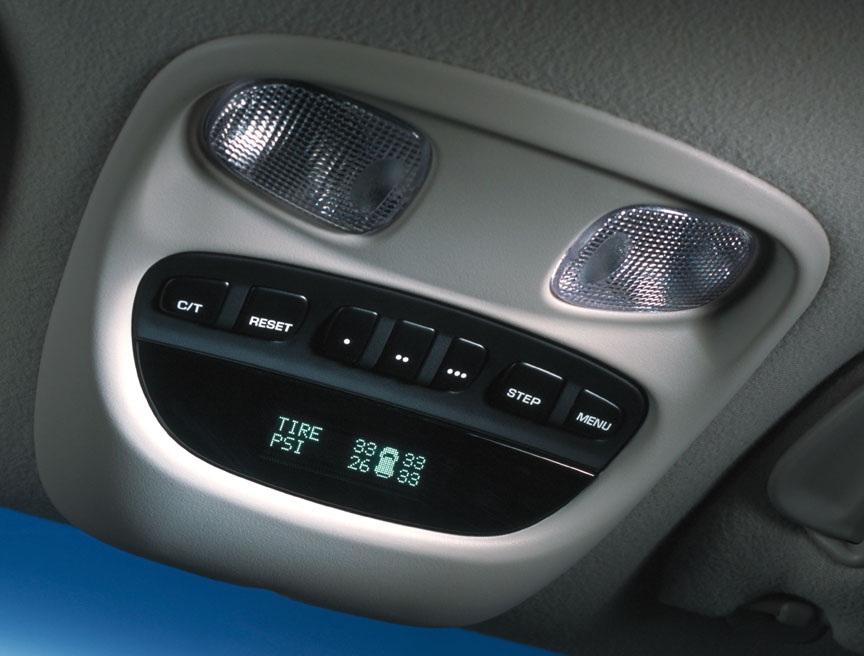
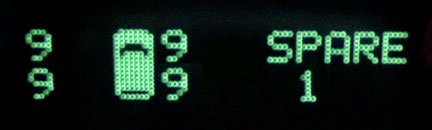
  D. A dashed line at the wheel location on the graphic display will be seen if the display is activated.

2. A low pressure sensor battery status


3. All five sensors are transmitting at a shorter than expected interval


4. No valid pressure sensor ID from the spare tire for 20 consecutive ignition cycles spaced at least one hour apart:

  A. An active fault code will be stored
  B. A Chime is requested
  C. "TIRE SENSOR BAD / MISSING" or "SERVICE TIRE PRESSURE SYSTEM" will be displayed.

Use the DRBIII® Input/Output function to further isolate the specific concern. The DRBIII® can be queried to determine the Sensor/Transmitter status:

"Invalid Pressure" - The Sensor/Transmitter is reporting a negative pressure or a pressure above 63 psi.
"Low Batt" - The Sensor/Transmitter has reported a low battery status for seven consecutive ignition cycles.
"Trained" - The Sensor/Transmitter ID code is recognized by the EVIC.
"Active" - The vehicle is moving at 25mph and/or the Sensor/Transmitter is "awake" and transmitting as expected by the EVIC.


SPARE WHEEL AUTO-LOCATE (5-TIRE TPM SYSTEM ONLY)

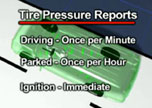
If the spare tire is mounted on the vehicle, the EVIC will detect the move and determine from the sensor transmit intervals, which wheels are mounted and which one is now the spare. The spare tire sensor/transmitter transmits once per hour. The sensor/transmitters in the mounted wheels transmit once per minute when the vehicle is moving at 25 mph.


"REMOVE MAGNET FROM SPARE" (5-TIRE TPM SYSTEM ONLY)

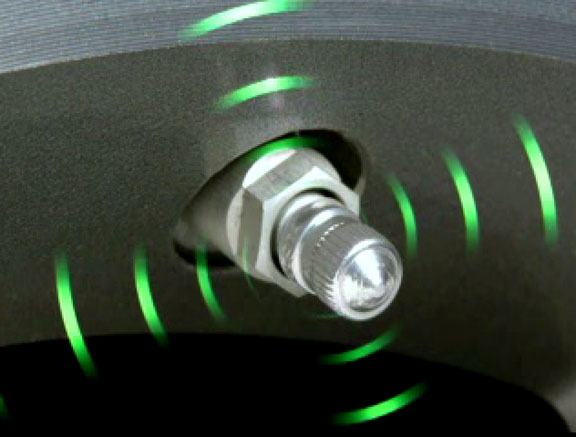
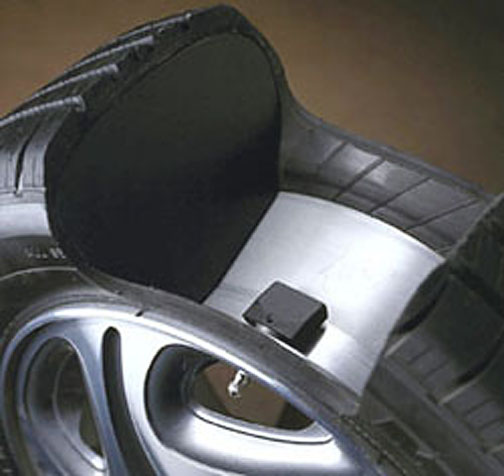
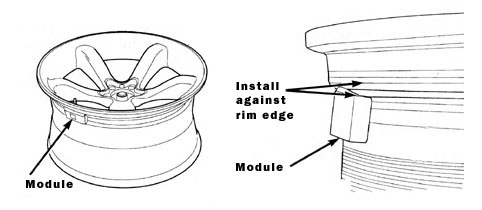
A magnet is used to initiate a sensor ID transmission. In the EVIC training procedure, the spare wheel is the last in the sequence. If the magnet is left on the wheel, the sensor/transmitter will continue its ID transmission. If the EVIC detects 20 transmissions from the spare wheel in 60 seconds and the vehicle speed is above 40 km/h (25 mph), it will:

A. Request a chime
B. Display "REMOVE MAGNET FROM SPARE" for 60 seconds per ignition-ON cycle


"TIRE PRESSURE UNAVAILABLE"

The EVIC can detect high radio noise interference. When the noise level is too high to distinguish a transmission from a sensor/transmitter, it will:

A. Display "TIRE PRESSURE UNAVAILABLE" for 5 seconds
B. Request a chime
C. Switch back to the previous screen


"TIRE PRESSURE NOW AVAILABLE"

If the "TIRE PRESSURE UNAVAILABLE" message was displayed because of radio noise interference, the EVIC will:

A. Display "TIRE PRESSURE NOW AVAILABLE" for 5 seconds
B. Request a chime when the noise level no longer interferes with sensor/transmitter transmissions


Further technical, diagnostic and safety information can be found in the Factory Service Manual.


PERSISTANT LOW TIRE PRESSURE WARNINGS

After the vehicle has set for 3 hours, check the tire pressures with an accurate pressure gauge and adjust pressures to the door placard pressure specfication and verify using accurate pressure gauge.

DO NOT USE THE EVIC DISPLAYED TIRE PRESSURE VALUES AS THESE MAY NOT REPRESENT THE UPDATED PRESSURE VALUE (Note: The EVIC will not update immediately. In order for the EVIC to update with the new tire pressures you must do one of two things: (1) Wait 15 minutes for the EVIC to update. This is because the TPMS sensors only measure the pressure in the tires during stationary mode every 15 minutes. Stationary mode is reached 15 minutes after the vehicle is parked. (2) Take a quick drive (must go over 20MPH for at least 5 seconds) to prompt the sensors to measure the pressures and therefore update the EVIC with the new pressures. During drive mode, the TPMS sensors check the pressure every 30 seconds).

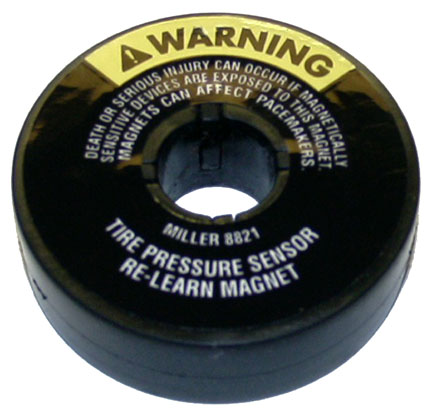
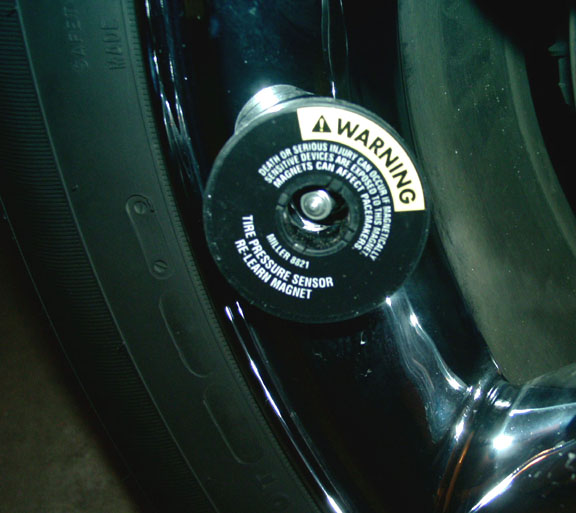
If the warning still persists, calibrate TPMS sensors (note that after training is completed, the training magnet must be removed from the valve stem or the TPMS sensor battery will become discharged). If the warning still persists the sensor(s) may need to be replaced.


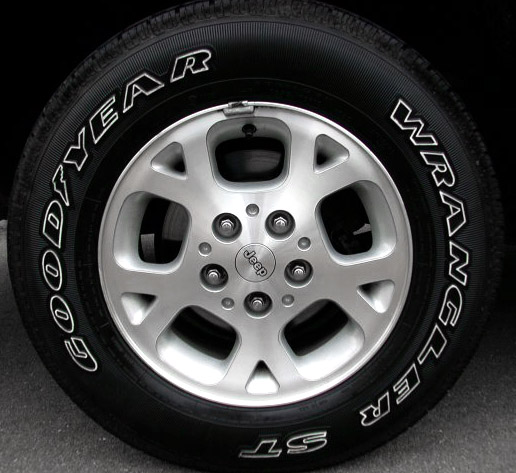
New SmarTire / Cycloid AutoPump system

A tire pump inside each wheel cap!


AutoPump tire system

Inertia compressor pump, internal circuit board, and pump shown mounted inside wheel cap.


A new advanced tire pressure monitor system from SmarTire has been tested on some prototype Jeeps. This system or one similar may appear on future models. In conjunction with an automatic tire AutoPump made by Cycloid, this combined system automatically and continously re-inflates tire pressure to a specified level, ensuring optimal inflation of tires under different situations and temperatures.

The inertia compressor is only 1" thick by 3" in diameter and weights a mere 8 ounces. Its expected design life is 130,000 miles, with ten years of battery power. The system has been shown at some past auto shows in the U.S., installed in the Grand Cherokee Concierge prototype concept car.


Top of page


Home     Main menu