 |
 |
| Badge removal and installation |
NOTE: Exterior nameplates are attached to body panels with adhesive tape.
1. Apply a length of masking tape on the body, parallel to the top or bottom edge of the nameplate to use as a guide, if necessary. An additional piece of tape can also be placed on the left or right side of the badge for more accurate alignment when reinstalling.
2. If temperature is below 21°C (70°F) warm emblem with a heat lamp or gun. Do not exceed 52°C (120°F) when heating emblem. A hair dryer may also be used.
3. Insert a plastic trim stick or a hard wood wedge behind the emblem to separate the adhesive backing from the body. A short length of fishing line can also be used.
4. Clean adhesive residue from body with MOPAR Super Clean solvent or equivalent.
1. Remove protective cover from adhesive tape on back of emblem.
2. Position emblem properly on body.
3. Press emblem firmly to body with palm of hand.
4. If temperature is below 21°C (70°F) warm emblem with a heat lamp or gun to assure adhesion. Do not exceed 52°C (120°F) when heating emblem.

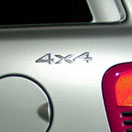
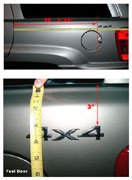
Jeep eliminated the 4x4 rear side badges starting with the 2002 model year (non-Quadradrive models have one 4x4 logo on the rear liftgate). Some owners like them, others like the "cleaner" look without them. They have long been a Jeep tradition. However, factory badges from 2001 or earlier models can be purchased from Jeep and easily installed, if desired. Shown below are the measurements for the exact location, which is the same for both sides. They are 26-3/16" over from the rear door edge and 3" below the bottom of the rear glass. Click on photos to enlarge.

Exterior badge removal
Installation